Docker is an open platform for distributed applications for developers and sysadmins. You can achieve agility and control for Development and IP Operations team to build, ship and run any application anywhere. It lets you quickly assemble applications from components and eliminates the friction that can come when shipping code. Using docker, you can get your code tested and deployed into production as fast as possible.
Docker containers, and the work flow that comes with them helps you in getting your code into production and make it useful. Docker containers run on almost everywhere. You can deploy containers on desktops, physical servers, virtual machines, into data centers, and up to public and private clouds.
Docker transforms all distributed applications that consists of many small applications into individual containers that are linked together. So, instead of having to build, run and manage each individual container separately, Docker Compose allows you to define your multi-container application with all of its dependencies in a single file then spin your application up in a single command. Your application’s structure and configuration are held in a single place which makes spinning up applications simple and repeatable everywhere.
Basic Requirements:
To install and use Docker compose on Ubuntu 14.04 , you need the root credentials to login to your Ubuntu instance then create a non-root sudo user.
You can use the following command to create a new user in Ubuntu.
# adduser ubuntu
Give the password and new user information and then run the following command to add the newly created group in ‘sudo’ group.
# gpasswd -a ubuntu sudo
Now you can use your ‘ubuntu’ user to run commands with super user privileges. After setting up the new user, you can switch to general user and then make sure that your ubuntu server is up to date with latest updates and security patches. You can use below command to update your server.
$ sudo apt-get update
Press the ‘Y’ key to continue with system update process.
Installing Docker:
After completing the prerequisites, now take your first step to install Docker image on Ubuntu. Docker image is like a complete Linux installation package that contains the minimum packages needed to run the image. So, the best and the easiest way to install Docker is to run the following command that will download and install its required Docker image.
$ wget -qO- https://get.docker.com/ | sh
The download process will take a while depending on the speed of your internet connection. After complete execution of this command, you will find the version of docker client and server as shown in the image below.
Then run the command below to use Docker as non-root user by adding your current user to the “docker” group.
$ sudo usermod -aG docker ubuntu
To activate the new “docker” group, you have to logout and then login again on your system.
Installing Docker Compose:
Docker Compose applications are easy to share with your teams. You just need to define your application with Docker Compose once and use that same configuration to run the application on other machines to save your time.
To install Docker compose, we need to install the following package as a prerequisite before installing the docker-compose.
$ sudo apt-get install python-pip
Press “Y” to continue the installation and a number of addition packages will be installed including our required package.
After that, you are ready to install docker-compose by running the below command in your command line terminal.
$ sudo pip install docker-compose

At the end of this command you will see that it has successfully installed docker-compose, docopt, requests, texttable and few other packages.
Testing Container with Docker Compose:
Docker containers are isolated from the host machine and the host machine has no access to the file system inside the Docker container by default.
Now, we are going to test docker-compose using the public docker registry and docker hub which contains the sample Hello world image.
Let’s create a new directory into your user’s home directory
$ mkdir hello-world
Now, create a new YAML file within this newly created directory using any of your editor and put the following two lines in it where your first line will be indicating the name of your container and the second line will specify the image that will be going to create the container.
$ vi hello-world/docker-compose.yml
docker-test:
image:	hello-world
After saving the file, run the following command to create the container with your current directory as shown below.
ubuntu@ubuntu-14:~/hello-world$ docker-compose up
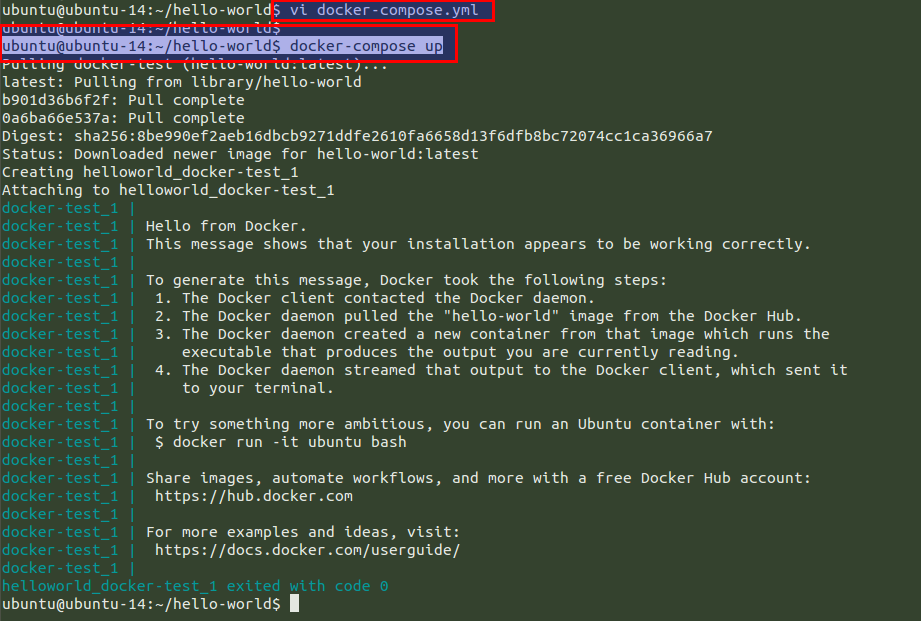
After successful execution of the ‘docker-compose up’ command, you can see the step that will take place while building the new container and fetching the latest hello-world image from it Docker hub repository.
Using Docker Compose Commands:
You can create multiple containers as many as you want by creating the separate directory and the YML within each new containers directory.
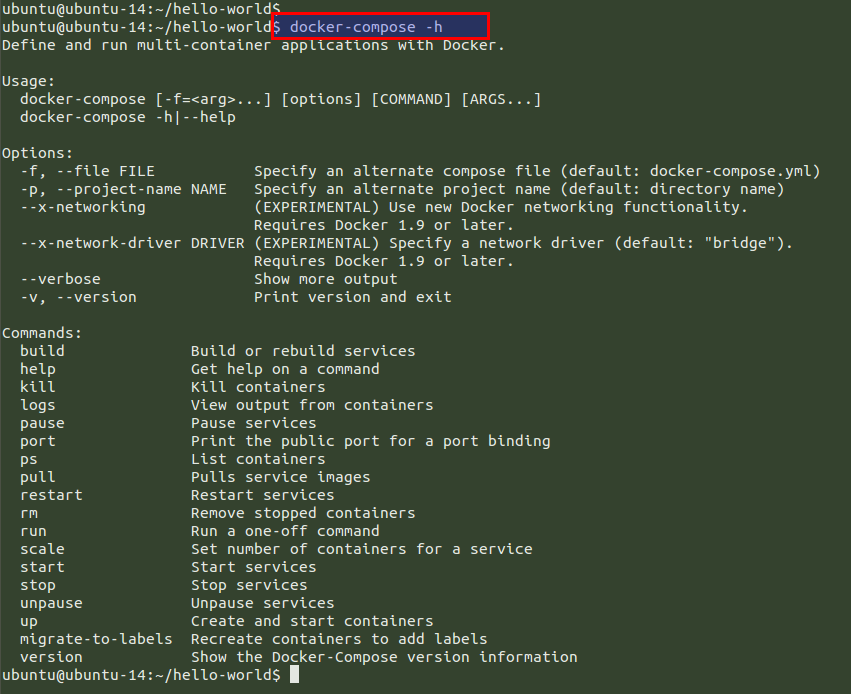
To use docker-compose from command line, run the following commands to get help in using its different command line options.
$ docker-compose -h
To check the total number of docker containers, you can run the below command.
$ docker-compose ps
To stop/start the docker container from your application group, use the below commands.
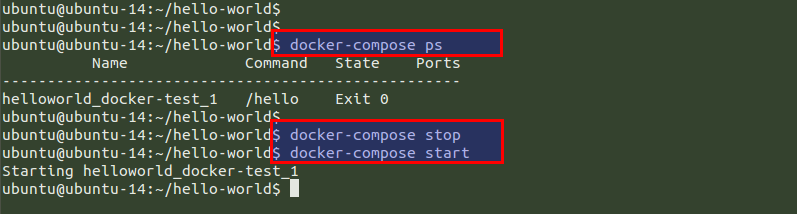
Here the Exit state shows that ‘helloworld_docker-test_1’ container is stopped if it is ‘Up’ then its means that your container in running.
Conclusion:
At the end of this tutorial, you learned about the basic concepts of Docker compose , its installation on Ubuntu 14.04 and its usage to create and manage new containers on docker-compose. You can also deploy multiple applications in no time using the docker-compose. We hope you found this article helpful as a starting point on docker. In our next article, we will show you the complete deployment steps in installing WordPress with PhpMyadmin using the Docker-compose on Ubuntu 14.04. Don’t hesitate to leave your feedback and let us know your comments and suggestions.
Would you like to know about Zuul, a CI/CD project gating tool? Download our white paper and get reading!