High availability refers to a system or component that is continuously operational for a desirably long length of time. Availability can be measured relative to “100% operational” or “never failing.” A widely-held but difficult-to-achieve standard of availability for a system or product is known as “five 9s” (99.999 percent) availability. Since a computer system or a network consists of many parts in which all parts usually need to be present in order for the whole to be operational, much planning for high availability centers around backup and failover processing, data storage, and access. So, for any system to be highly available, the parts of a system should be well-designed, configured thoroughly tested before they are used.
In this guide, we will show you to use keepalived to set up a highly available web service on Ubuntu 16.04 by using a floating IP address that can be moved between two capable web servers. The keepalived daemon can be used to monitor services or systems and to automatically failover to a standby if their’s any problems occur. If the primary server goes down, the floating IP will be moved to the second server automatically, allowing service to resume by the help of floating IP that we are gonna use in this tutorial.
Prerequisites:
In this article we are going to use 2 Ubuntu 16.04 nodes, with 2 CPUs, 1 GB RAM and 40 GB disk on each server with their fully qualified domain name setup and Private networking enabled within the same data center.
Let’s log in to both your Ubuntu 16.04 nodes using non-root user with sudo privileges and then follow the below steps to achieve the target of setting up high availability web servers with keepalived and floating IP.
Nginx Installation:
Here we will be using Nginx as a simple web server, in order to reduce our operational complexity besides ‘keepalived’.
Run the below commands to update you system first with latest packages and security updates and then install Nginx package on your Ubuntu 16.04 servers.
$ sudo apt-get update
$ sudo apt-get install nginx
In order to setup high availability , we need both servers to serve exactly the same content. So, we will use Nginx to indicate that the two servers are serving our requests at any given time. Let’s change the default index.html page on each of our hosts by opening the below file.
$ sudo vim /usr/share/nginx/html/index.html
On your first server, replace or append the contents of the file with below lines.
Primary Node
On your second server, replace or append the contents of the file with below contents and save your changes using :wq! .
Secondary Node
Build and Install Keepalived:
Now install the keepalived daemon on both servers. There is a version of keepalived in Ubuntu’s default repositories, which is outdated and suffers from a few bugs that might prevent our configuration from working. So, we will install the latest version of keepalived from source after installing the dependencies needed to build the software using the command below.
$ sudo apt-get install build-essential libssl-dev
Once the dependencies are in place, we can download the tarball for keepalived by visiting Official Keepalive download page to find the latest version of the software.
Just right-click on the latest version and copy the link address to download this package on your server using wget on your system.
$ wget http://www.keepalived.org/software/keepalived-1.2.23.tar.gz
After downloading, extract the archive using tar and move into the extracted folder using below commands.
$ tar -zxf keepalived-1.2.23.tar.gz
$ cd keepalived-1.2.23
Now compile and install the keepalived package by flowing the commands below.
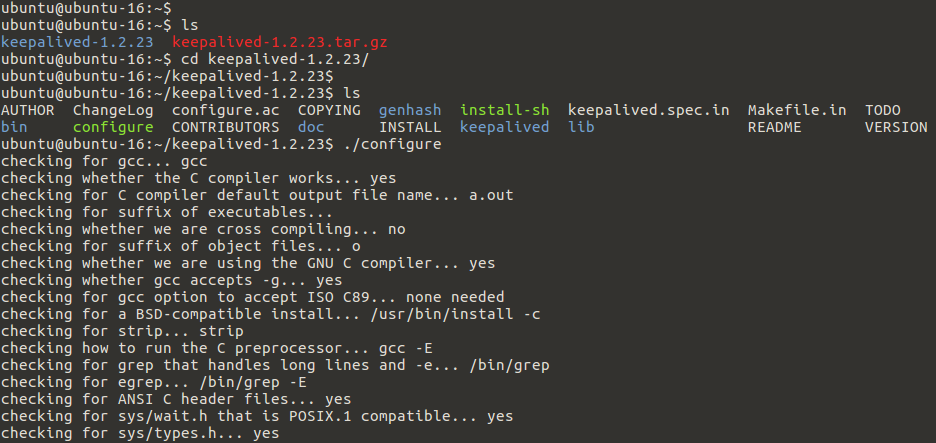
$ ./configure
Your system will be compiled by showing the configuration parameters like below.
Keepalived configuration
------------------------
Keepalived version       : 1.2.23
Compiler                 : gcc
Compiler flags           : -g -O2
Extra Lib                : -lssl -lcrypto -lcrypt
Use IPVS Framework       : Yes
IPVS sync daemon support : Yes
IPVS use libnl           : No
fwmark socket support    : Yes
Use VRRP Framework       : Yes
Use VRRP VMAC            : Yes
Use VRRP authentication  : Yes
SNMP keepalived support  : No
SNMP checker support     : No
SNMP RFCv2 support       : No
SNMP RFCv3 support       : No
SHA1 support             : No
Use Debug flags          : No
Memory alloc check       : No
libnl version            : None
Use IPv4 devconf         : No
Use libiptc              : No
Use libipset             : No
ubuntu@ubuntu-16:~/keepalived-1.2.23$
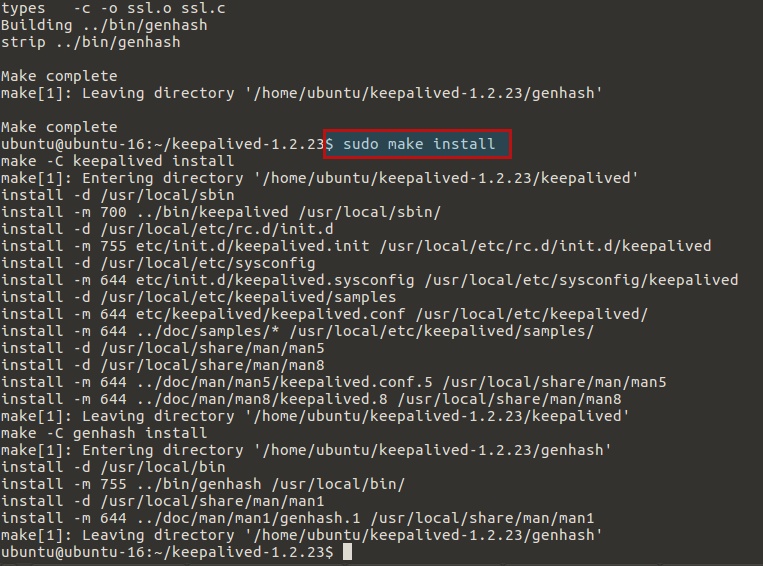
Now it’s time to install keepalived, let run the below command and we have all done for the next step.
$ make
$ sudo make install
Setting up Upstart Script for Keepalived:
After installation of keepalived, we are going to create a simple Upstart script to handle our keepalived service by creating a new keepalived.conf file within the /etc/init directory to get started.
Let’s open the file using any of your editor and then specify the run levels in which the service should be started and stopped. We want this service to be active in all normal conditions (runlevels 2-5) and stopped for all other runlevels (when reboot, poweroff, or single-user mode is initiated, for instance). So add the below entries in it starting with its description.
$ sudo vim /etc/init/keepalived.conf
description "load-balancing and high-availability service"

start on runlevel [2345]
stop on runlevel [!2345]
Since the service is integral to ensuring our web service remains available, we want to restart this service in the event of any failure. for that we need to specify the actual exec line that will start the service by adding the --dont-fork option so that Upstart can track the pid correctly.
respawn

exec /usr/local/sbin/keepalived --dont-fork
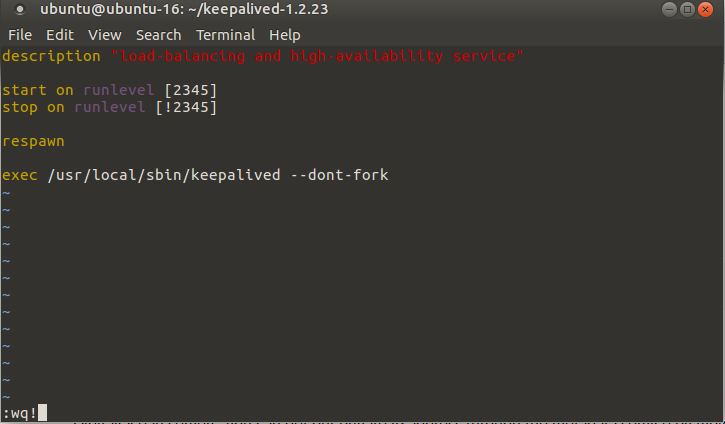
Here is the image view of the full configurations shown below, now save and close the file to move ahead.
Setup Keepalived Configuration:
The keepalived service looks for its configuration files in the /etc/keepalived directory. For this purpose we need to create a directory on both of your servers by using below commands.
$ sudo mkdir -p /etc/keepalived
Now before we create the configuration file, find the private IP addresses of both of your servers. This can be found with the iproute2 tools by typing below command.
$ ip -4 addr show dev ens3
Copy this value from both of your systems as we will need to reference these addresses inside of our configuration files below.
Configuring Primary Server:
On your primary server, create the main keepalived configuration file. The daemon looks for a file called keepalived.conf inside of the /etc/keepalived directory with below command and put the following contents in it.
$ sudo vim /etc/keepalived/keepalived.conf
vrr_script chk_nginx {
    script "pidof nginx"
    interval 2
}
Then open a block called vrrp_instance which is the main configuration section that defines the way that keepalived will implement high availability. Then assign an ID for this cluster group that will be shared by both nodes. We also set up some simple authentication for our keepalived daemons to communicate with one another. After that we will tell keepalived to use the routine we created at the top of the file, labeled chk_nginx, to determine the health of the local system.
So the overall primary configuration should look like below.
vrrp_script chk_nginx {
    script "pidof nginx"
    interval 2
}

vrrp_instance VI_1 {
    interface ens3
    state MASTER
    priority 200

    virtual_router_id 44
    unicast_src_ip primary_private_IP
    unicast_peer {
        secondary_private_IP
    }

    authentication {
        auth_type PASS
        auth_pass password
    }

    track_script {
        chk_nginx
    }

    notify_master /etc/keepalived/master.sh
}
Now save the Primary server’s configuration and move to the Secondary servers configurations file setup.
Configuring Secondary Server:
In our secondary server, we will create the companion script on our secondary server by creating file at /etc/keepalived/keepalived.conf on it.
The most of the configurations will be similar to our Primary server’s configurations file.
Just make sure to update the proper parameters for state, priority, unicast_src_ip and unicast_peer . And your final secondary server configuration files should be like as shown below.
vrrp_script chk_nginx {
    script "pidof nginx"
    interval 2
}

vrrp_instance VI_1 {
    interface ens3
    state BACKUP
    priority 100

    virtual_router_id 33
    unicast_src_ip secondary_private_IP
    unicast_peer {
        primary_private_IP
    }

    authentication {
        auth_type PASS
        auth_pass password
    }

    track_script {
        chk_nginx
    }

    notify_master /etc/keepalived/master.sh
}
Save the configuration file after making required changes and move to the next step.
Setup Floating IP
Here we need to create and assign a floating IP address to the current node whenever the local keepalived instance becomes the master server.
The floating IP can assigned from the Vexxhost cloud portal to your working node. Just Login to the portal and click on “Floating IPS” and then click to create new Floating IP and then Assign it to your desired server as shown below.
Once you have assigned the Floating IP then if you visit the floating IP in your web browser, you should see your “Primary Server Node” index.html page.
Starting Keepalived and Testing Failover:
As we setup the floating IP to one or our master node. Now we can start the service on both of our machines by issuing the below commands.
$ sudo systemctl start keepalived
The service should start up on each server and contact its peer, authenticating with the shared secret we configured. Each daemon will monitor the local Nginx process and will listen to signals from the remote keepalived process.
So, if you visit by opening your web browser by flowing the floating IP address then we will see the Nginx page of your Primary web server.
Now, can test the failover of our configuration. The failover should occur the Nginx health check on the primary server indicates that Nginx is no longer running. In this case, the primary server’s keepalived daemon will enter the “fault” state. It will notify the secondary server that it should transition to the master state and claim the floating IP. Or when the secondary server loses its keepalived connection to the primary server. If the secondary server cannot reach the primary server for any reason, it will transition to the “master” state and attempt to claim the floating IP.
We can test the first condition by stopping the Nginx service on the primary server.
Primary-Node$sudo service nginx stop
Now refresh your web browser, you might initially get a response indicating that the page is not available, but after a while, you will see the Nginx web page of your Secondary server node.
If you refresh the page again, you will find that the primary server has reclaimed ownership of the floating IP again.
Conclusion:
That’s it, we have successfully installed and setup Highly Available Web Servers with Keepalived and Floating IP on primary and secondary Ubuntu 16.04 nodes. As you can see, for a simple IP failover, keepalived is much simpler than corosync/pacemaker to set up. So, i hope you have got this article much helpful and interesting. If you still found and issue or need to post your suggestions then you are more than welcome to share your contributions in the comments section.
