Our cloud server customers often ask about the best way to run a PHP and MySQL application stack on ...
Our cloud server customers often ask about the best way to run a PHP and MySQL application stack on our cloud servers. There are so many different web servers from the go-to Apache to really high performance customized web servers such as Tornado, which is deployed by large-scale users such as Facebook!
We recommend the combination for nginx, php-fpm and Percona Server with XtraDB (the optimized version of MySQL). We've found that the combination of all three creates a high-performance setup that can take full advantage of your cloud services efficiently. Let's get into a bit of detail about each of them and why we choose them.
Nginx
nginx, pronounced “Engine X” was written by Igor Sysoev, a Russian system and software engineer. The idea behind it was to create an extremely scalable web server that can solve the C10K problem. The watered-down simple version of the C10K problem is a simple fact that serving files shouldn't require such a huge overhead, this issue is solved by leveraging event-based systems which are implemented into the kernel such as epoll, poll, the Solaris alternative /dev/poll and the FreeBSD/NetBSD/OS X kqueue.
The good thing is that nginx has proven itself since 2004 until now to be the best choice to get the most performance out of your servers. As an example, our friends at CloudFlare run a modified version of nginx over their entire network of 23 data centers all around the world that have served 70 billion page views, each month.
PHP-FPM
php-fpm is hands down the fastest way of running PHP scripts. It was created by Andrei Nigmatulin. There was no way to run PHP with a FastCGI interface so he took it on himself to start building it. Eventually, the interest caught on as people saw the performance increase and more people started contributing to the project. Initially, it was a set of patches that were applied to the PHP source code and eventually become a module.
However, it's position really solidified when it was merged into the main PHP project core after work by Antony Dovgal and others. It has now become the official FastCGI SAPI for PHP, it's also used by a lot of users from all around the world like WordPress!
Percona Server with XtraDB
Percona is one of the leaders of high-performance MySQL servers. They provide a highly optimized MySQL database server which is capable of giving a huge performance increase. They even have commercial support should you require anything more and have very helpful and supportive community help.
We cannot stress this enough, make sure you are using InnoDB for your databases and not MyISAM. You really, really, really want to be using InnoDB. We will explain this in an upcoming post but let's just say one of the biggest performance reasons is full table locking on changes. If you're inserting or updating a row, your whole table cannot be used until that operation is completed.
In other words, if you're running Facebook and someone is updating their profile, you're going to wait until their update query is complete for your queries to run, which slows down things significantly. This goes to mention that MyISAM still has good, but we'll put all that for a blog post on its own, for now, InnoDB!
Installing the software stack
These instructions will be specific to CentOS 6 however they are very similar for Debian and Ubuntu, the package names are usually just different and you'll be using apt-get instead of yum.
- We like to always install from packages instead of building from source, this ensures that you can get support easier and those packages have most probably been tested by multiple other parties and any other problems you see will easy to find as others might have seen them!
- We will install the Percona Server first. The repository helps make this extremely easy and allows us to easily upgrade when new releases come out without having to recompile from source. The following script will install everything, setup MySQL to start on system boot and set a secure root password for MySQL, then display it. You'll need to note down the password as it's very important to have.
- Your database server is now setup! Let's set up the PHP backend, it's pretty simple and fairly straightforward. We'll assume that you're not looking to do virtual hosting and just need to host 1 single website. We'll do that small
sedbecause we'll be using thenginxuser to run on instead ofapache. - The PHP backend is now running, we're at the final stages, we'll start by installing the
nginxwebserver and making it run on system boot. - We'll need to edit the
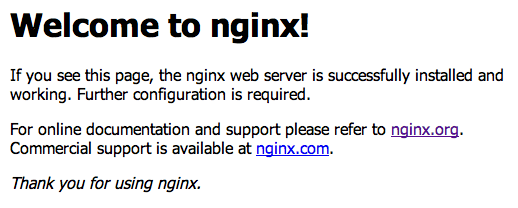
/etc/nginx/conf.d/default.conffile to connect thenginxserver to ourphp-fpmbackend. You can use any editor that you want, you'll update it as the following, the red lines should be removed and the green should be added. Once we've done all those changes, we'll startnginxand we're going to have our entire system setup and ready now. - We'll be able to verify the installation by going to the servers main IP address in a browser and we'll be able to see a message like the following:

- Now, we'll make this an extra step and make sure PHP works, you'll need to create the file
/usr/share/nginx/html/phpinfo.phpwith the following contents and navigate to it (http://your.ip/phpinfo.php), you should see information about your PHP installation. - We'll quickly install WordPress to make sure everything is working properly. Make sure to replace
$SQL_PWwith your root password which we created. If you haven't logged out of your session, it should be still there, you can verify this by typingecho $SQL_PW. If it's still there, you don't need to replace it in those commands!
You'll see a message showing your WordPress database user password so make sure you note that as well.
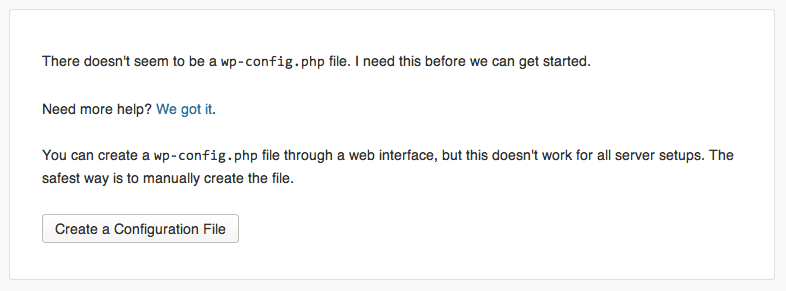
- The rest of the installation for WordPress can be completed using their simple installation, so we'll navigate to the installation page which should be at (http://your.ip/wordpress) and it should look something like this. Click on Create a Configuration File to get started.

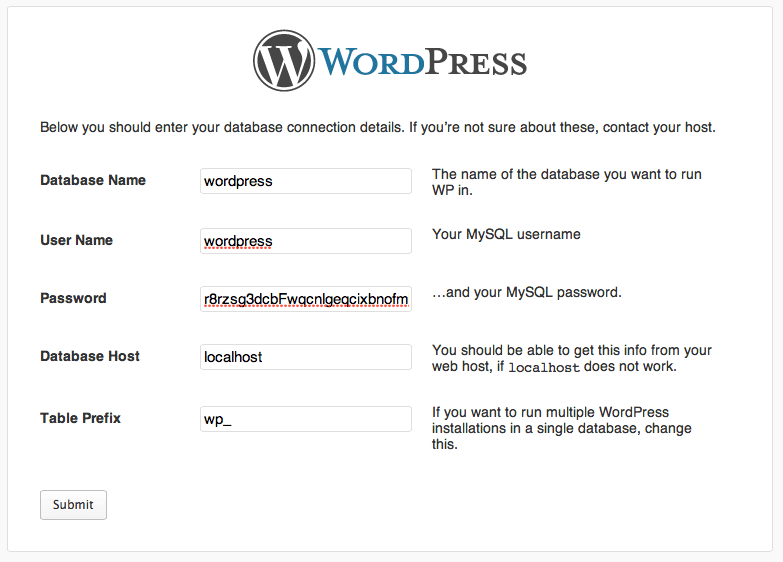
- Make sure to fill the form with the details like in the picture, replacing the password with the one you obtained from step 8.

It should go through with no problems, the rest of the installation should be personal website settings, you can set those to whatever you'd like and finish the installation. You can navigate (http://your.ip/wordpress) and check out your brand new installation!
Finals words
We really think that this setup can get you quite far on a single server, but if your site keeps getting busier and busier, you can add more backend workers, nginx instances or even set up a clustered MySQL backend. The nice thing about this is that all of your technology stacks are ready to scale up and scale-out.
If you're ever looking for a fully deployed custom cluster, we've built multiple clusters which handle very large amounts of traffic for our customers and they are extremely happy with the fast performance we're able to deliver by leveraging our cloud platform, contact us today with your requirements and we'll make them happy.
